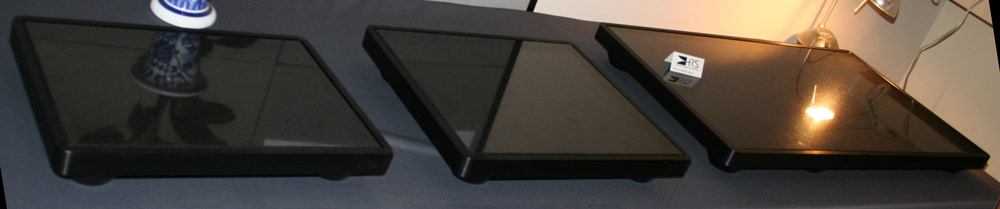
This experience report was originally written several years ago and is on part of the old Audio Federation website that we are abandoning. Originally written around 2004, we are updating it and posting it here to make it more accessible and, hopefully, more useful for people who are interested in what the HRS M3 and M3X platforms can do..
CD Players, Transports, DACs
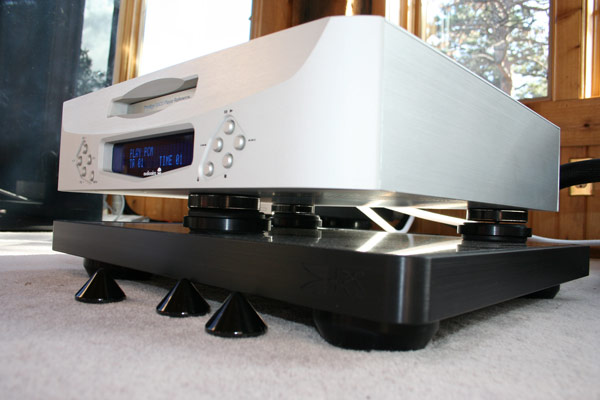
Audio Aero Capitole Mk II
The player’s sound was significantly improved with the isolation base under it, especially the quality of the bass and midrange articulation and timbre. This is a pretty typical result.
Audio Aero Prestige
The player’s sound was significantly improved with the isolation base under it, especially the quality of the bass and midrange articulation and timbre. The radical improvement obtained by adding adding Nimbuses between the player and the Isolation Base is described below.
[Update] Audio Aero LaSource
The player’s sound was improved with the isolation base under it, especially the quality of the bass and midrange articulation and timbre. The radical improvement obtained by adding adding Nimbus / Couplers between the player and the Isolation Base, and making sure that the Black Diamond Racing cone feet that come with the player are suspended in air and not being used at all, is a critical requirement to make this player really live up to its significant potential, turning a kind of sweet yet muddy sound into a rich sound with lots and lots of resolution.
Audio Note U.K. 4.1x Balanced DAC
Similar to our experiences with the Lamm L2 preamp, we just do not have enough Isolation Bases to go round, and though this DAC has had a platform temporarily underneath it at various time – all I can remember is that there was a general nod in its direction that it improved things, but that the scarcity of platforms forced us to fairly soon thereafter move it to a higher profiles system for a series of demos. [Update 2014] We eventually got a boatload of the M3X Isolation Bases and, although never losing its harmonic richness and ‘rightness’, the bases always made sure that there was an evenness in resolution and detail across the frequency band. Similarly with the Audio Note DAC 5 Signature and Fifth Element DAC
EMM Labs DCC2 DAC
This component experienced the least improvement of any component we have tried on a HRS. We do use a damping plate on top, which has some positive effect. We hope to try Nimbuses between the DAC and the Isolation Base soon to see if this is what is required to get the usual significant delta in performance we experience with other components (often the feet that a component comes with seem to negate a lot of the effects of the HRS).
We’ll let you know!
[Update 2014] In general, as we saw with this DAC and as EMM Labs built more and robust [and heavier] components, well-built solid-state gear usually shows noticeably less improvement than does tube gear or transports. That said, there is still improvement, and in a system that tends toward brightness, putting a platform and Nimbus Couplers under even robust solid-state gear can and usually, in our experience, does make a world of difference and often eliminates the brightness [i.e. brightness and especially hardness is often caused by insufficient resolution, which the Isolation Bases always help with].
Preamplifiers
Lamm L2 Tube Preamplifier
OK, confession time. We cannot afford to buy all the Isolation Bases that we want… I mean need… in order to put them under all of our components. I know that at one time we did have an HRS underneath this component – but it has been awhile. I remember it working as expected – but I am 99% certain that one or another of the two pieces associated with this preamp (it has a separate power supply) were not on an HRS. So we look forward to both being on a platform – hopefully soon when we get our gloss black MXR rack here.
[Update 2014] Whew! That was a long time ago as we have had our MXR here for a long time, and an SXR, and… We almost never use the Lamm L2 without a platform: it is tube-based and the chassis is somewhat thin and resonant. A prime candidate for HRS racks and platforms. More dynamics and more resolution and tightens up the bass. This is pretty typical behavior – HRS does this for all components, to some degree, linearizing their response: in both resolution and dynamics across the frequency spectrum. This predictability of HRS in many different situations makes it an obvious choice compared to other solutions which are unpredictable and can sometimes even be deleterious in various systems and circumstances.
[Update 2014] Audio Note M9 and M10 pre-amplifiers
These preamps are capable of generating extremely powerful near-real-world dynamics. The M3X Isolation Bases increase and tighten these dynamics, making the whole experience a rush, while at the same time revealing their truly significant resolution which is otherwise somewhat hard to hear out of these puppies when they are sitting on top of your standard equipment rack.
[Update 2014] EMM Labs PRE2 preamplifier
Solid-state and robustly built, the improvements here are similar, but not jaw-dropping, compared to the improvement one sees for tube-based preamps.
Amplifiers
Edge Signature One monoblocks
A real but somewhat surreptitious improvement in clarity of the bass was observed.
Lamm ML1.1 Tube monoblocks
An amazing amount of clarity was added to the midrange and bass, making these amps sound much more controlled and even across the frequency spectrum.
Lamm ML2 Tube monoblocks
I am not sure we ever used these amps without the M3 Isolation Base – so the improvements over using another platform (the Acoustic Dreams is what we usually use – which is no slacker either and we’d put it up against any of the competition [at $350/platform]) we can only assume is the same significant increase we found with the Lamm ML1.1.
We did try putting different HRS feet, ones specifically for lighter weight components, on the front because the front of the Lamm is so much lighter than the rear. I personally did not hear much of a difference using these differently configured feet in the front, not to say there wasn’t any, but that it did not jump out at me.
When we put some Nimbuses between the amps and the Isolation Bases, however, it was one of those “now we’re talkin'” moments, which you can read more about [in the next post].
[Update 2014] Lamm ML3 monoblocks
This amps have so much to offer in terms of resolution, both harmonic and dynamic, that we have always used these on top of a M3X Isolation Base, and with Nimbus Couplers between the amps and the M3X. – just to milk as much performance as possible from them.
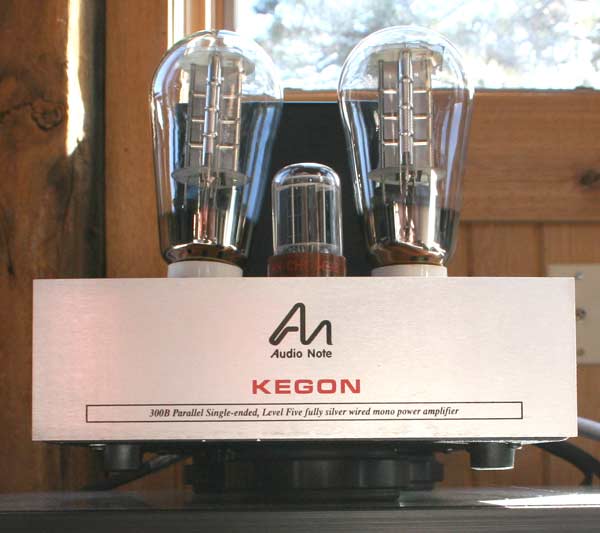
[Update 2014] Audio Note Kegon, Audio Note Ongaku, Audio Note Kegon Balanced, Audio Note GakuOn [etc].
In general, the behavior of the Isolation Bases under Audio Note amplifiers is about the same as for that under Lamm amplifiers, but perhaps only about 75% the overall impact, specially as you move up the line into the heavier components. With the 55lb Kegons, the impact is similar to that of the ML2 [i.e. massive]. The midrange and bass both tighten up significantly resulting in much more resolution at those frequencies. With the 80lb Ongaku, less so – same kind of improvement but at only 80% or so as important as putting one of these under a lighter amp.
Turntables
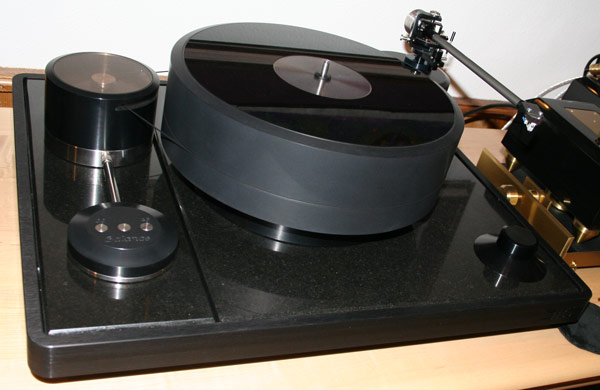
Brinkmann Balance turntable
HRS makes a custom platform for the Brinkmann Balance turntable.
Before the Brinkmann we used the Acapella Fondato Silenzio platform. After using this platform under both the Walker Proscenium Gold Signature and the Brinkmann, both times on the top shelf of a maple Rix Rax Grand Hoodoo – we have found that the Fondato is not the best thing for turntables (it works quite well under CDs and tube DACs and preamps) and the turntable sounds better directly on the Rix Rax shelf.
When we put the custom HRS M3 Isolation Base underneath the Brinkmann, we finally started hearing what the table could do. Before it had sounded a little thin and tizzy, and we changed cartridges a few times trying to find an solution. But it turned out to be a vibration problems. After adding the HRS the turntable sounded rich and more controlled, with more continuousness and PRaT.
Considering the comparatively high price of the turntable, getting the HRS platform for it is a no brainer.
[Update 2014] Hopefully after all this you can look at your own components: solid-state or tube, thick heavy chassis or thin metal chassis, normal feet or feet with some kind of contrived technology [in our experience, component manufacturers who try and make vibration controlling feet fail miserably – but this is perhaps more a discussion on the Nimbus Coupler experience reports].
You can now predict with some degree of confidence the impact the HRS M3X will have on the sound of your component.
This is unique, in our experience, for equipment racks and platforms that claim to help with vibrations. Predictability. And no harmful side-effects.
Unless you really prefer your sound to be dense and syrupy, which, you know, some audiophiles do, these platforms and their couplers are a must have.